Cheerful Ways to Decorate your Home within a Budget

Home decor is one of the main fantasies that anyone harbors. But the reality shocks everyone as they find themselves always on a budget. While it may seem an end to the little dreams you keep in your mind, it is untrue. There is no necessity to call a professional for decorating a home. All you need is a slightly creative bent of mind to give a fantastic new look to your home. This article is all about bringing a whole new look to your home within a budget. We are here to help and rest assured you do not need a professional.

Utilize your painting skills

You can pick up some crude photo frames from cheap item shops and use the technique of spray painting technique to give a funky look to it. It will look like a reasonable piece of modern art without much effort. Moreover, a fresh look will be pulled off without spending dollars in double figures.

Hide things that you do not want to be seen

There are things that have witnessed flaws in recent times. While they may look completely out of place, you cannot afford the expenditure of replacing them. Such items can be pulled away from eyes by means of clever disguise. For instance, a stain on the carpet can be hidden under a funky rug.

Decorate your table

Bring in old letters and envelopes and strew them all over the table. This will give an intriguing look to your table. People will be interested in finding out more about the letters. A riveted gaze will prove the success of this method of decor.

Borrow old furniture from people around you

People do replace their furniture from time to time. Ask your friends and relatives for old furniture and they will be happy to give it away to you. There is no embarrassment at all in doing this. In fact, they will be happy.

Get colors on your hands

Painting is actually fun and you would realize it only when you get your hands on it. In fact, hiring someone to paint your room is not economical when you can do it yourself.

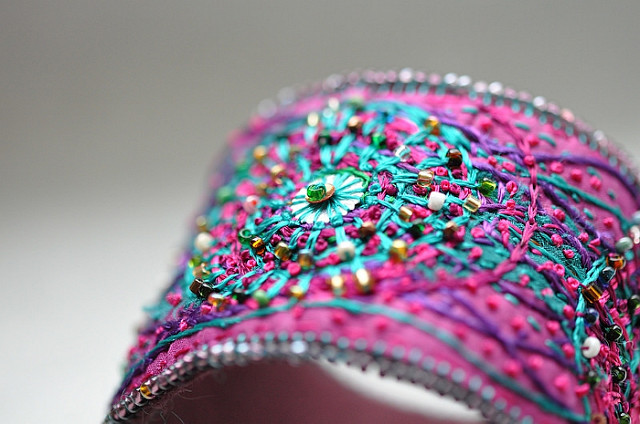
Utilize discarded jewellery

You might have truckloads of discarded jewellery at your home. The fact prevails that these items would remain for embellishing purposes. You can continue their use by placing a magnet between them and the fridge. It will look amazing.

Get creative

There are no better home accessories than those that are created by hand. It costs literally nothing create small pieces of art yourself. You should try it especially when on a budget.

Create more things on your own

You can sew your own cushions. It is not a huge task to carry out and it gives you an advantage to custom make your cushions in accord with the needs.

Hence, decorating your home does not cost much. You can create happy things at your home without any remarkable effort. Decorate today!

Grilled Cheese Bombs

Name cheese and there are people running all over you. If there is one perennial favorite thing shared by most of the people in this world, it is gonna be cheese. The name leads to watering of mouth. To feed your fetish for cheese, we bring to you a whole amazing package of cheese in the form of small balls we will purposefully call bombs. This delight makes way for your daily snacks to make your life all the more happening. And we are happy to have served. Without rambling on much, we have the entire recipe elaborated for you asunder.

The time required and other small details regarding the recipe

This recipe falls into the category of easy to make recipes and is one of those effortless delights that give you the comfort of getting satisfied in some minutes. To state the specifics, the total time for making this recipe is about an hour and 25 minutes. Out of this, about 10 minutes would go into the preparations. This easy recipe we are going to discuss would yield 16 bombs in total.

The ingredients that would be required

Like most recipes, the Cheese Bombs also carry a set of requirements with it. These requirements need to be fulfilled to pull it off near perfection. The list goes as under:

  • Some kosher salt
  • A teaspoon of parsley, preferably chopped
  • 2 tablespoons of butter that has been melted
  • 1 inch cubes of cheddar cheese, 16 in total
  • A tube of cookie dough

When these items are ready in the right quantities, you can proceed with the process for cooking.

The process for cooking

The recipe is easy to make. There is no doubt about that. However, we recommend that you go through the process that has been elaborated as under. Sticking to every step ensures that you do not end up screwing things up.

  • Put the cheese cubes on some tray and transfer to the freezer for about 1-2 hours.
  • Fire up your oven to a preheating temperature of 400 degrees Fahrenheit. Place parchment paper on a baking sheet of medium size.
  • Take the dough out from the container and cut it in half with a knife such that you obtain two rounds.
  • Use the square cheese to occupy spaces at the center of the dough that has been sliced. Now wrap the dough so that the cheese is covered.
  • Seal the dough together properly. The process has to be repeated until you are left with no cheese squares and dough.
  • Grab a little bowl and in it, bring together parsley and butter.
  • Use the mixture just created to brush over bombs. Seasoning can be done with salt.
  • Transfer to the oven to bake. Carry on baking until the color appears golden. This should take about 10-15 minutes.

Now, your Cheese Bombs are ready to serve.

This is the ease with which you can enjoy your favorite cheese in a dough ball. So, there is no point waiting. Bake now!

Funnel Cake Fries

Sometimes we have weird cravings for exotic desserts. At times, we want these desserts to be light on our diets. At times like these, there are some all-time favorite desserts that pan out the best. Funnel Cake Fries is one of those stupendous desserts. It even rings some carnival bells in our minds. As far as the taste is concerned, these fries are succulent both on the inside and the outside. They are fluffy, sweet and crispy at the same time. There is actually nothing more you could ask for. And guess what? They are easy to make and consume lesser than expected time. So, let us focus on how to get them on your platter.

The time required and other small details

It takes a total time of about just about 20 minutes to pull off near perfect Funnel Cake Fries. Out of these 20 minutes, there is a preparation time of about 15 minutes and a cooking time of about 5 minutes. There would be about 316 kilocalories in a total yield of 8 sweet invitations to happiness.

The ingredients that would be required

Like every traditional thing that can be called a recipe, Funnel Cake Fries also carries with it a list of items that go into the making of it. That list has been elaborated as under:

  • Marshmallow fluff
  • Caramel sauce
  • Some powdered sugar
  • 3 cups of vegetable oil
  • A teaspoon of essence of vanilla
  • Half a cup of milk
  • ¼ cup of sugar
  • 2 eggs, large
  • Half a teaspoon of salt
  • A teaspoon of baking powder
  • 2 cups of flour, preferably all-purpose

When these items are ready on your kitchen shelf, you can proceed with the process of cooking.

The process for cooking

As mentioned earlier as well, this process is fairly easy to carry as there are no intricacies, in particular, you need to take care of. However, we shall recommend that you try to stick to the steps that have been worked out and listed as under:

  • Grab a medium-sized bowl and bring together salt, baking powder, and flour in it.
  • Grab another bowl of the same size and bring together vanilla, milk, sugar, and eggs in it. The contents should be mixed together thoroughly until a frothy mixture is obtained.
  • Now add the contents of the previous bowl into this and go on to blend until a smooth mixture is obtained.
  • This completes your batter.
  • Grab a medium-sized saucepan and add oil into it. Place it over a flame and allow to heat till 350 degrees Fahrenheit.
  • Get the batter inside a pastry bag. Draw long fries into the searing oil. Go on to fry until the fries appear golden. This should take about 30 to 60 seconds.
  • Take the fries out onto a plate with paper towels.
  • Sprinkle the powdered sugar to garnish and serve with marshmallow fluff and caramel sauce.

Hence, you have the most succulent dessert on your platter. We say that there is no point waiting. Fry now!

How to use a Torque Wrench

The torque wrench defines a tool that comes in handy in the field of automobile repair. This tool needs to be calibrated properly before using with your vehicle. A properly calibrates torque wrench is able to provide enough turning momentum and torque to work with any kind of nut or bolt. The human effort is significantly reduced and accuracy is elevated with the help of this tool. The only thing remains that you need to be aware of the way a torque wrench is supposed to be operated. We bring this write-up to you to act as a guide to using a torque wrench. The instructions given below pan out best when intricately carried out.

Be aware of the calibration

Calibration forms the vital part of a torque wrench. When you go out for purchasing a torque wrench, prefer certified dealers over used part dealers. However, if you do for a used torque wrench, do not forget to get it recalibrated.

Collect data about the specification of your specimen

It is essential to know the limitations of the nuts you are going to use your torque wrench with. A measure generally obtained in units of foot-pounds, it specifies which tool you would need for the work at hand.

Make sure that the nuts are not significantly damaged

A worn-out nut or bolt is at a huge risk of being damaged further by the use of torque wrench. You are advised to avoid using the tool with a damaged work field.

Go for a regular wrench before torque wrench

It is recommended that whenever you go for tightening the nuts, use a wrench to set them in a comfortable position before tightening.

Get the grip right

Your torque wrench is provided with a plastic grip on its handle. This is the position where the best torque is obtained.

Now get the other end right

Place the other end right onto the nut to begin.

Get it done

Move the wrench in a clockwise direction so as to cause tightening of nuts.

The following steps work out if your torque wrench offers an adjustment through click

Place the bolts in position

Lightly tighten bolts into the thread position before beginning with the torque action.

The adjustment

Your adjustable torque wrench is provided with a dial that can be turned to specify the amount of torque. Set this dial to the torque that is specific to your work.

Set wrench in position

Make sure that you have the grip in your hands while the other end is on the nuts.

Tighten the bolts

Apply clockwise momentum to your torque wrench to cause a tightening action on the bolt. This is to be done until a sound of click is heard.

Culminating your work

Once you have finished the work, bring the dial back to zero so that the spring can rest.

Hence, you know how to work with your torque wrench. There is certainly no need to rush to the service center for small problems. Get yourself a torque wrench and start working today!

How to save materials from your home’s arts and scraps

There is a huge pile of materials that you dispose of everyday, considering them waste materials. While it may seem that such materials serve no purpose, the conjecture is untrue because there are several ways in which material can be safeguarded from your home scrap. This write-up is all about reviving the items you consider waste, and thus instilling a new life into your mundane. This introduction may appear senseless in the first go, but it will make sense as you continue to read. Let us lead you into a series of information that can prove handy and economical.

Why recycling material is important

One reason is the everyday environment safety rant. The materials from scrap can be easily reused and more and more resources can be saved every day. Another reason is that the items from scrap can be effectively used to embellish your home. If you feel creative enough, you can give a new look to empty bottles or jars. Rest assured these items will give you a stunning look. More information would continue as below.

The items that can be recycles from scrap

Here is a pretty long list of items that can indeed be recycled from scrap. Here it goes:

  • Wooden items or purposeless wood: Wood can be termed as the most important decor item in your living room. Wood can actually serve purpose even after it starts to die out. Wood blocks strewn around may be used to build a rack or a plain item that can be displayed at home. If the blocks have been rendered to no use, they can double up as firewood.
  • Worn-out tyres: The tyres that cannot be used with your car, can be made into swings for your patio. If you feel economical, you can sell them to the nearest gas station for recycling.
  • Old newspaper, bubble wrap and cardboard: Needless to mention, a little amount of creativity can easily turn these into decor accessories. Moreover, they can double up as packaging items.
  • Paper: The most abundant scrap. Paper may be recycled to draw sketches on.
  • Clothes: Clothes can be the most necessary items to use for decor. Your old clothes can be made into covers for cushions with a small amount of sewing job.
  • Bottles and jars: As mentioned earlier also, these items can come in handy when you think creative. Bottles and jars are used as storage for stationery or a base material to plant saplings.
  • Envelopes: They come in handy to make rough notes on.
  • Plastic bags: These items can be easily reused. You can use plastic bags to carry items from place to place or to store important files once they are organized inside drawers.

To conclude, your home is a place where nothing can really be called useless. Most of the items in the scrap can be reused as something more beautiful. Do not be afraid to give a creative touch to your home at any time.

Get creative today!

Pull Apart Pizza Star

There is nothing more irresistible in this world than a beautifully crafted pizza. You cannot ever say no to pizza and the new recipes that pop up around it. The recipe is stunning yet one of the easiest recipes you can pull off. Also, there would not be a requirement of a cutter as the pieces of pizza are all ready pulled apart. The recipe turns out to be versatile and goes well with most settings from small house parties to date nights. The puffy pizza is succulent and fun during the process of making it. We would not make you drool much now, so let us begin with the details of the recipe.

The time required and other details

This recipe is going to be fairly easy to make and would not bother you with a lengthy cooking process. Specifically, there would be a total time requirement of 25 minutes; of this, 20 minutes would go into cooking while 5 minutes would be needed in preparing it before going into oven. The end product would be composed of 12 hefty serving. The nutritional value is clogged at a whopping 344 kilocalories.

The ingredients that would be required

Like every other recipe, this recipe also gives you a small list of items that must be prepared in order to pull it off. That particular list is as given below:

  • Some marinara sauce, will be used for dipping
  • 2 tablespoons of water
  • An egg
  • 2 cups full of mozzarella cheese, preferably shredded
  • A cup full of marinara sauce, taken separate from the first ingredient
  • About 3 packages of pizza dough, refrigerated

When you are ready with these items near your oven, there is not much wait left. Continue to the process for cooking.

The process for cooking

This recipe, as discussed earlier, is fairly easy to make. However, you are advised to stick to the steps we have worked out as under for a near perfect bake.

  • Fire up your oven to a preheating temperature of 400 degrees Fahrenheit. Keep a sheet for baking, aside.
  • Remove the cap of the dough can and empty on a parchment paper. Carve a circle with a 10-inch plate or cake pan.
  • Use half the cup of marinara sauce on the dough. Use half of the contents of mozzarella to add to this dough. This process is to be repeated.
  • Now use the third dough can. Place the plate over it. Clear the excess dough with a knife.
  • Grab a little bowl and turn it upside down over the middle of dough. Now use the knife to cut slices as you keep the central part put.
  • Now you have to twist every slice independently in opposite directions. Do it twice for each slice.
  • Grab a smaller ball and add water and eggs to it. Beat them together. Use the mixture to brush the slices.
  • Transfer the pizza to the oven for about 20 minutes.

Done!

It is that easy to make a star pizza. So, do it today!

Ninja Coffee Bar Brewer System CF097 – My Review

Ninja has emerged as a top choice among the coffee enthusiasts. I prefer calling me a coffee fanatic for I cannot, I repeat, I cannot breathe without coffee. Looking at the growing fad, I decided to get my hands on a Ninja Coffee Brewer myself. I went for the CF097 model and I must say there was not much space given for disappointment. I am going to elaborate the review in the forthcoming discussion for the readers to make a choice for themselves. I must iterate that I have been testing and reviewing coffee brewers for quite some time now.

The signature Ninja features

Every Ninja brewer comes with four types of brews out of the box. This feature is more than enough to set a standard apart from the mundane world of coffee brewers. A bit on the brewing systems is given as under:

  • Specialty brew: This kind of brew consists of amplified flavors of coffee deemed fitting for your favorite lattes.
  • Over-ice: The result of this brew is a highly concentrated coffee fitting for pouring over ice, thus ensuring that ice does not ruin a strong coffee experience for you.
  • Rich brew: As the name suggests, the result of this brew is stronger than usual cup of coffee.
  • Classic brew: A classic styled normally flavored coffee.

The Ninja brewer does not require its filter to be replaced

One of most lucrative aspects about the Ninja brewers is that they come preinstalled with a permanent filter that can use over and over again with any worry.

The choice of carafes

The Ninja Coffee Bar Brewer comes with 2 types of carafes:

  • Thermal Carafe: This is a carafe made of stainless steel and well suited for times when you need to preserve hot coffee for later times.
  • Glass Carafe: This carafe is kept at the optimum temperature by means of a heating plate with an automated turn-off system working for 2 hours.

The things that I like about the Ninja Coffee Bar Brewer CF097

While I have discussed some of the important features of the brewer system, it would now be pertinent to take up things that did not quite live up to the mark. Those things are:

  • You would be surprised to know that despite so many impressive features, there is nothing that could stop the brewing process automatically.
  • The coffee loses heat when placed in a thermal carafe in about an hour. This happens when heating plate is not used.

The things that really appealed to me

There are things that did not fail to impress. They are:

  • There is an indicator light which comes to life when there is a need for descaling.
  • The Auto-iQ system is present in this model.
  • CF097 is incredibly quick with iced coffee.
  • The stainless steel carafe with a capacity of 50 ounces is able to keep coffee hot for longer periods.

To draw a conclusion, I must say I am quite taken aback by the features this device has to offer. Keeping everything in mind, I would definitely recommend it to coffee lovers like me. Happy brewing!

Top 3 Smoothie Recipes for your Ninja

Ninja Blender system is veritably a treasure trove for beverage lovers. This den is something where almost all the blender recipes of this world reside. The blender makes sure that you are never out of ideas for your drinks. In this write-up, we would focus on our top 3 picks in the smoothie recipes for your Ninja Blender. The recipes are given as under:

One for your morning

There is nothing more refreshing than a morning beverage. It is even better when it is something different for the ordinary. This recipe has been named ‘Morning Berry’. And, here’s how to make it on your Ninja.

The required ingredients

  • One and half cups of mixed berries, frozen
  • 2 tablespoons of flaxseed
  • 3 tablespoons of honey
  • One and a half cups of almond milk
  • A medium-sized banana, ripe, halved

The brewing instructions

  • Beginning at the bottom of the list of ingredients, add them to the Blender Cup rated High-Speed.
  • Select the setting of EXTRACT
  • After blending has been done, remove the blades.

Done! Your perfect morning beverage is ready.

Another one for a refreshing break

This recipe can also double up as your favorite morning beverage for everything it has to offer – perfect nutritional composition and a refreshing air. This recipe goes well with the model CT682SP.

The required ingredients

  • Half cup of ice
  • Half a cup of coconut water
  • A teaspoon of lemon juice
  • 4 leaves of mint
  • ¾ of a cup of kale leaves
  • A teaspoon of hemp hearts
  • A piece of English cucumber, 2-inches long and halved
  • About half of an apple that has been cored, peeled and halved

The brewing instructions

Stick to the following steps for the perfect brew.

  • Beginning at the bottom of the list of ingredients, add them to the Blender Cup rated High-Speed.
  • Select the setting of EXTRACT
  • After blending has been done, remove the blades.

Let us talk nutrition

By now, it may seem that we have framed out a perfect plan for your diet. Well, it is pretty much what you think because we have yet again turned up with a smoothie with focus on nutrition. We call this the ‘Apple Pie Smoothie’ and is fitting on the model CT641.

The required ingredients

  • A cup of ice
  • 1/8th of teaspoon of salt
  • 1/8th of a teaspoon of nutmeg, ground
  • ¼ teaspoon of cinnamon, ground
  • One and a half teaspoons of brown sugar
  • ¾ teaspoon of lemon juice
  • A cup of almond milk, unsweetened
  • An apple that has been cored, peeled and quartered

The brewing process

  • Beginning at the bottom of the list of ingredients, add them into the Blender Cup rated High-Speed.
  • Select the setting of SMOOTHIE
  • After blending has been done, remove the blades.

Thus, your Apple Pie Smoothie is ready.

The top three picks from the best smoothie recipes ensure that you never fail to have a great day with your Ninja Blender. Happy brewing!